Key takeaways
- Thulium connects through a dedicated API user you create in the admin.
- You hand over three things: your Thulium URL, the API user’s login and its password.
- Create the API user under Administration → API Users, and save the login and password – they are shown once.
- After the integration, the Agent starts switched off – it will not reply until you enable it.
What the connection does
Thulium is your helpdesk inbox. Once connected, the AI Inbox Support Agent reads incoming tickets and drafts or sends replies to the routine ones – “where is my order?”, returns, delivery questions – in the customer’s own language, around the clock, handing the judgment calls to your team. You stay in control: it starts off, and you turn it on when you are ready.
Before you start
- Access to your Thulium admin.
Step 1 – Find your Thulium URL
Sign in to Thulium and look at the browser address bar. Your URL is the https://[your-name].thulium.com part – that is the first of the three things you will hand over.
Step 2 – Create an API user
- Go to the Administration tab.
- Open the API Users tab.
- Click Add user.
- Fill in the form. Save the Login and Password – you will hand them over. In permissions, enter or select the
*symbol.
Step 3 – Connect it in AskSpot
That is the Thulium side done. You connect the Agent yourself in the AskSpot partner panel:
- Sign in to partners.askspot.io.
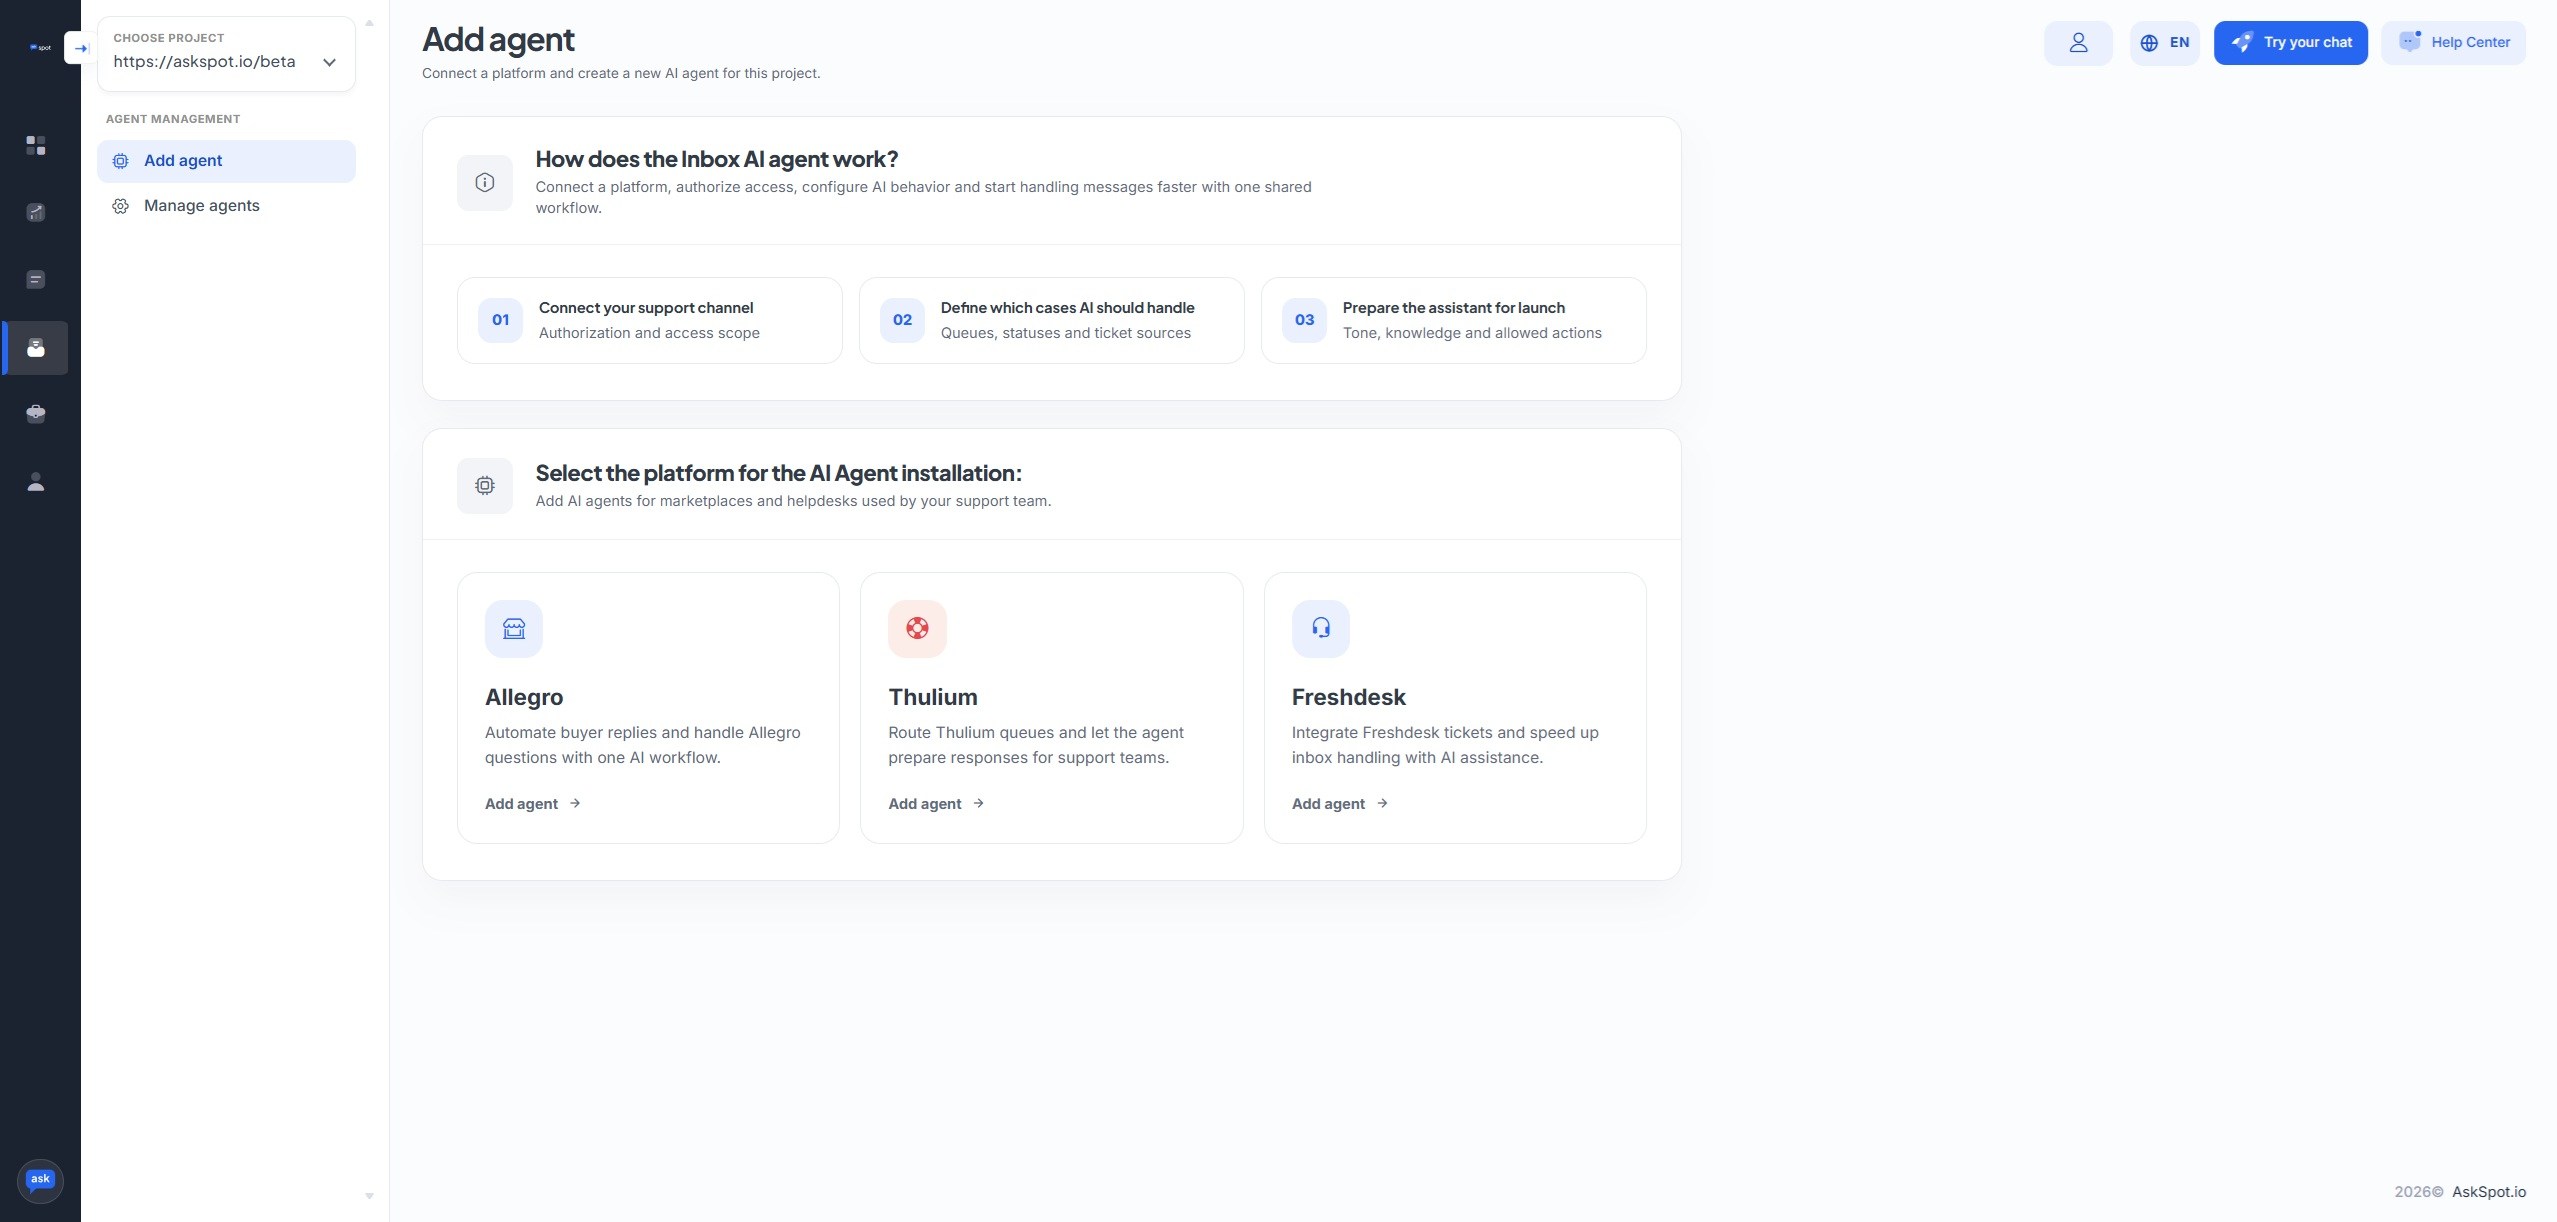
- In the menu, choose Inbox AI Agents.
- Pick Thulium as the platform to install the Agent on.
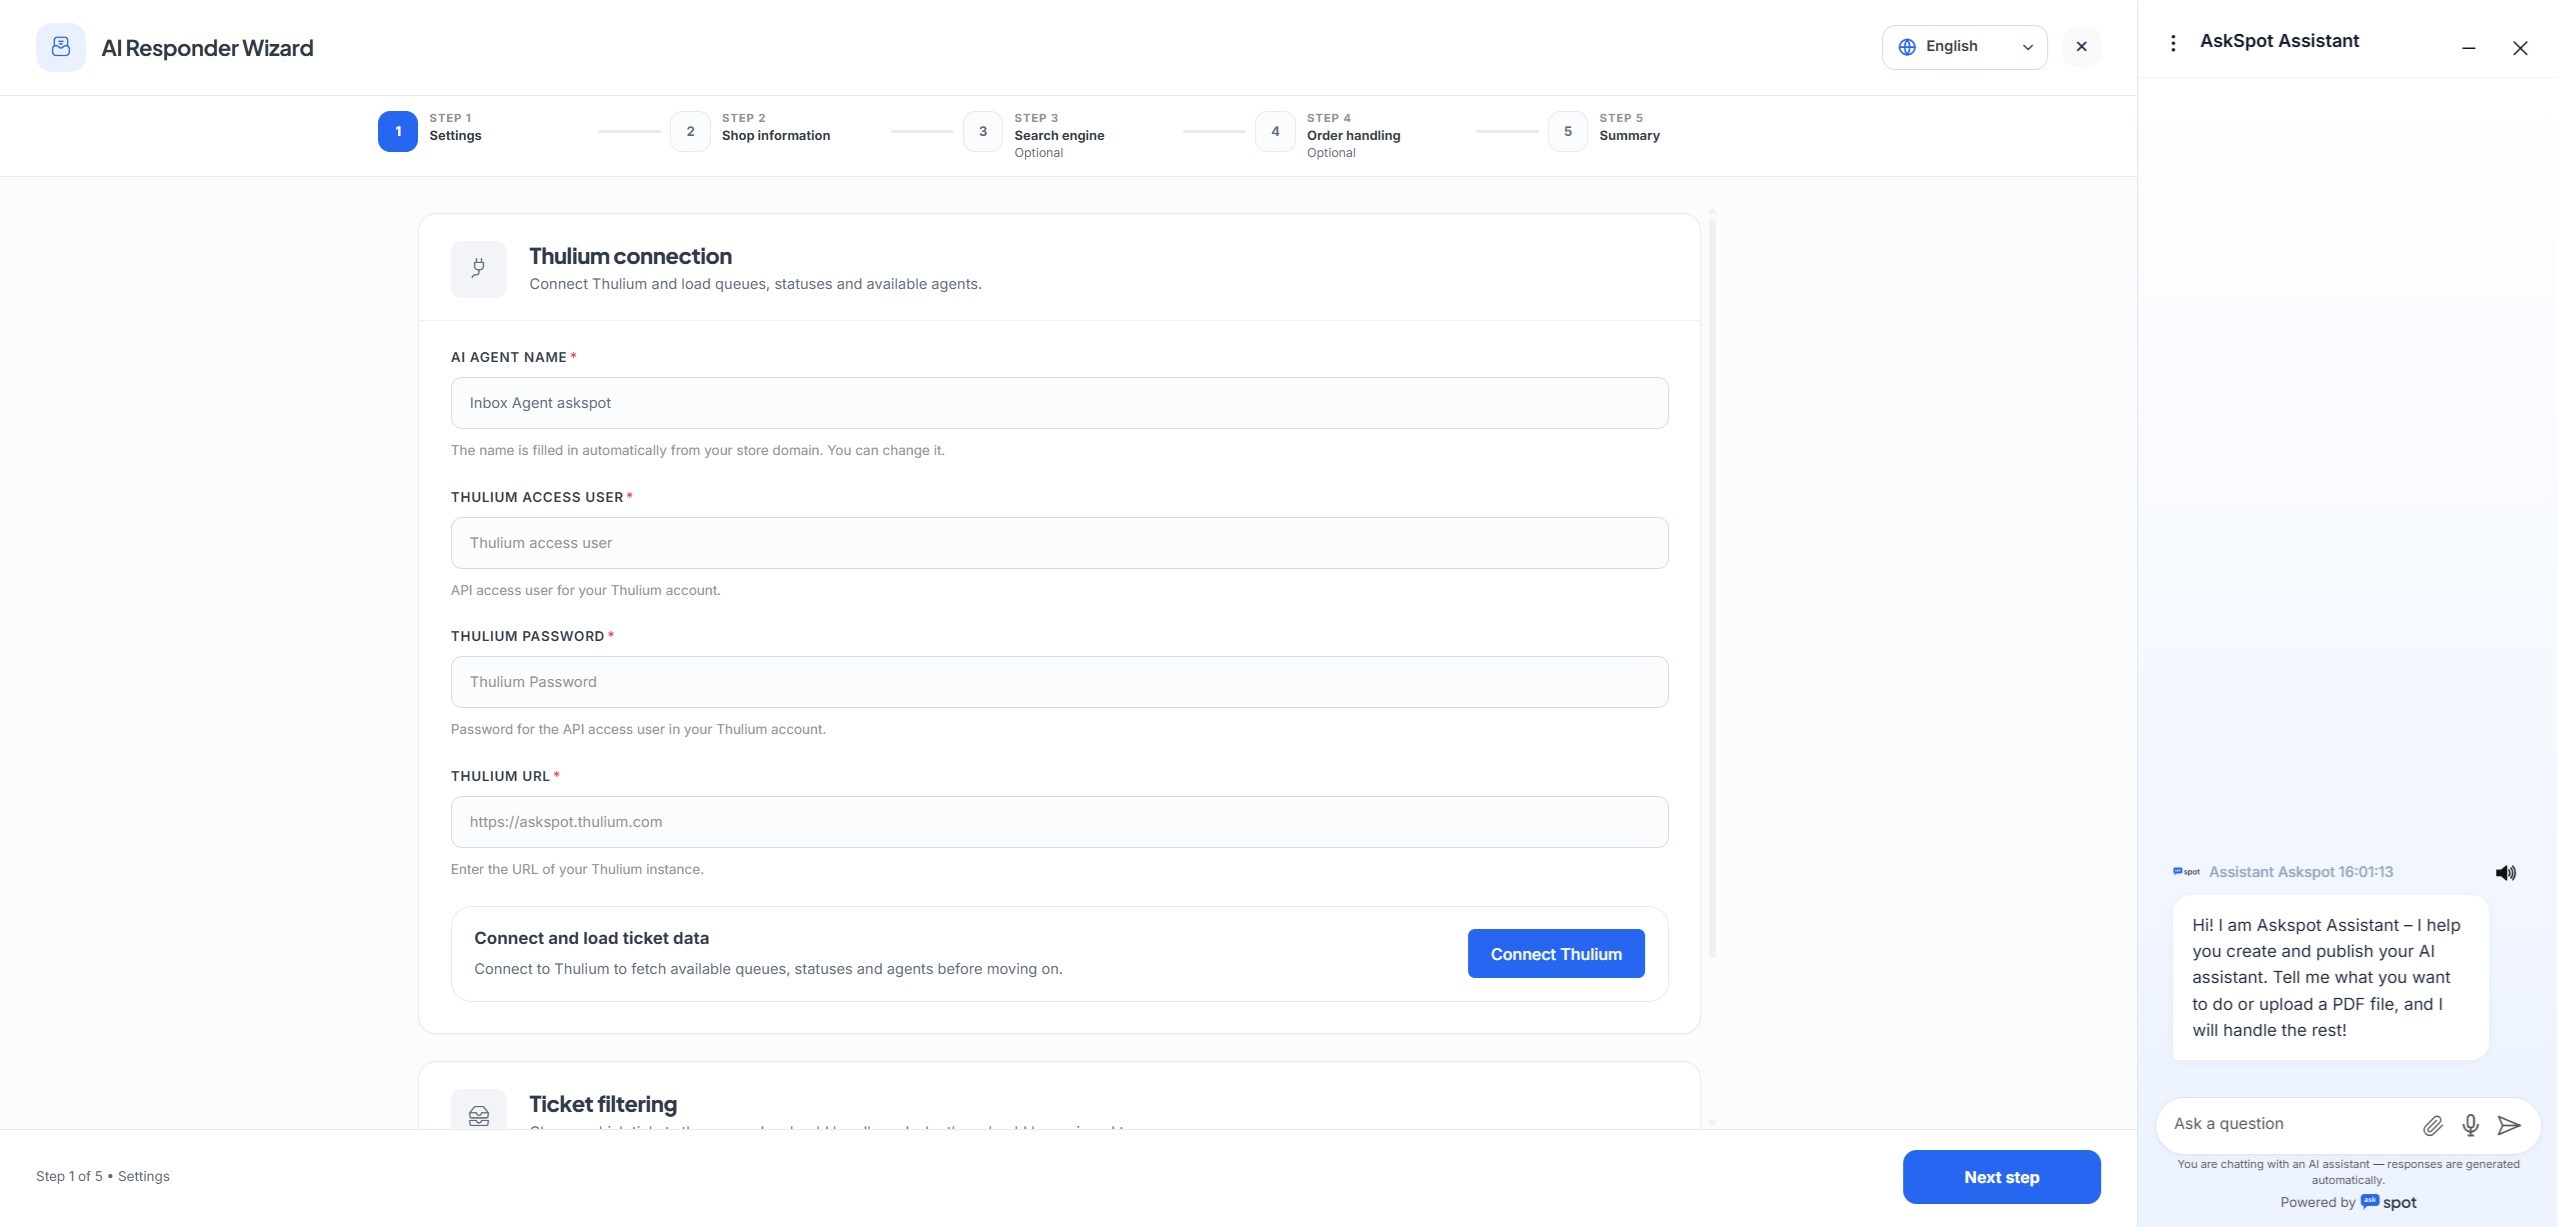
- Fill in the form with the data from Step 2 – your Thulium URL (
https://[your-name].thulium.com), the API user’s login and its password. - Save the configuration. Leave the Agent in test mode to start.
Stuck? Ask the Help center. The AskSpot panel has a Help center in the top-right corner. Tell it what you want to set up and it walks you through connecting and configuring the Agent – you don’t have to do it alone.
The Agent starts off. After the integration is set up, the AI Inbox Agent is switched off by default – it will not reply to anything until you turn it on. So there is no risk of an unexpected message going out while you are still setting up.
For the rollout ladder – test, draft then live – and the full picture, see the Thulium integration.
What do I need to hand over?
Three things: your Thulium URL (https://[your-name].thulium.com), and the API user’s login and password from Step 2.
Will the Agent start replying immediately?
No. After the integration it is switched off by default. It only starts working once you enable it – so you can review and test first.
Where do I create the API user?
In the Thulium admin, under Administration → API Users → Add user. Save the login and password, and set the permissions to *.