Key takeaways
- Magento 2 exposes order data through a custom Integration you create under System → Integrations.
- Grant read access to the Sales resource – it covers Orders, Shipments and Invoices.
- Activating the integration reveals four keys – you add the Access Token in the AskSpot panel yourself.
- The Agent only ever reads (GET) – nothing in your store is modified.
What the connection does
Magento 2 (Adobe Commerce) exposes your data through integrations. You create one for AskSpot, grant it read access to the Sales resource, and activate it – and from then on an AI Chat Agent built for e-commerce can look up an order status and answer “where is my order?” in the shopper’s own words, at any hour. The whole process is read-only, so nothing in your store can be changed.
Before you start
- Access to the Magento 2 admin with rights to create integrations.
Step 1 – Open Integrations
- Sign in to your Magento admin.
- In the left menu, open System.
- Under Extensions, click Integrations. (Path:
System → Integrations.)
Step 2 – Add a new integration
On the integrations list, click Add New Integration in the top-right corner.
Step 3 – Enter the basics
- In the Integration Info tab, fill in Name with something you will recognise, e.g. AskSpot_API.
- Leave the other fields (Email, Callback URL, Identity link URL) empty.
- Switch to the API tab on the left.
Step 4 – Grant Sales access (the important one)
- In Resource Access, choose Custom.
- In the resource tree that appears, find the top-level Sales branch.
- Tick the Sales checkbox – it automatically selects the sub-resources (Orders, Shipments, Invoices, and so on).
Why Sales? AskSpot needs to read order data and shipment/delivery data – both live under the Sales branch. Granting the whole branch is the simplest, most reliable way to make it work, and every call is read-only (GET), so no data is ever modified.
Step 5 – Save and activate
- Click Save in the top-right corner. You return to the integrations list, where the new integration shows as Inactive.
- In its row, under Actions, click Activate.
Step 6 – Allow and copy the keys
- A dialog asks you to confirm access to the selected resources. Click Allow.
- Magento then shows four values: Consumer Key, Consumer Secret, Access Token and Access Token Secret.
Step 7 – Add the details in AskSpot
That is the Magento side done. You add the connection yourself in the AskSpot partner panel – there is no need to send us the credentials:
- Sign in to partners.askspot.io.
- Open your chat settings and go to Order Handling.
- Choose Magento as the platform.
- Enter your store domain (with
https://, e.g.https://mystore.com) and the Access Token from Step 6. - Save.
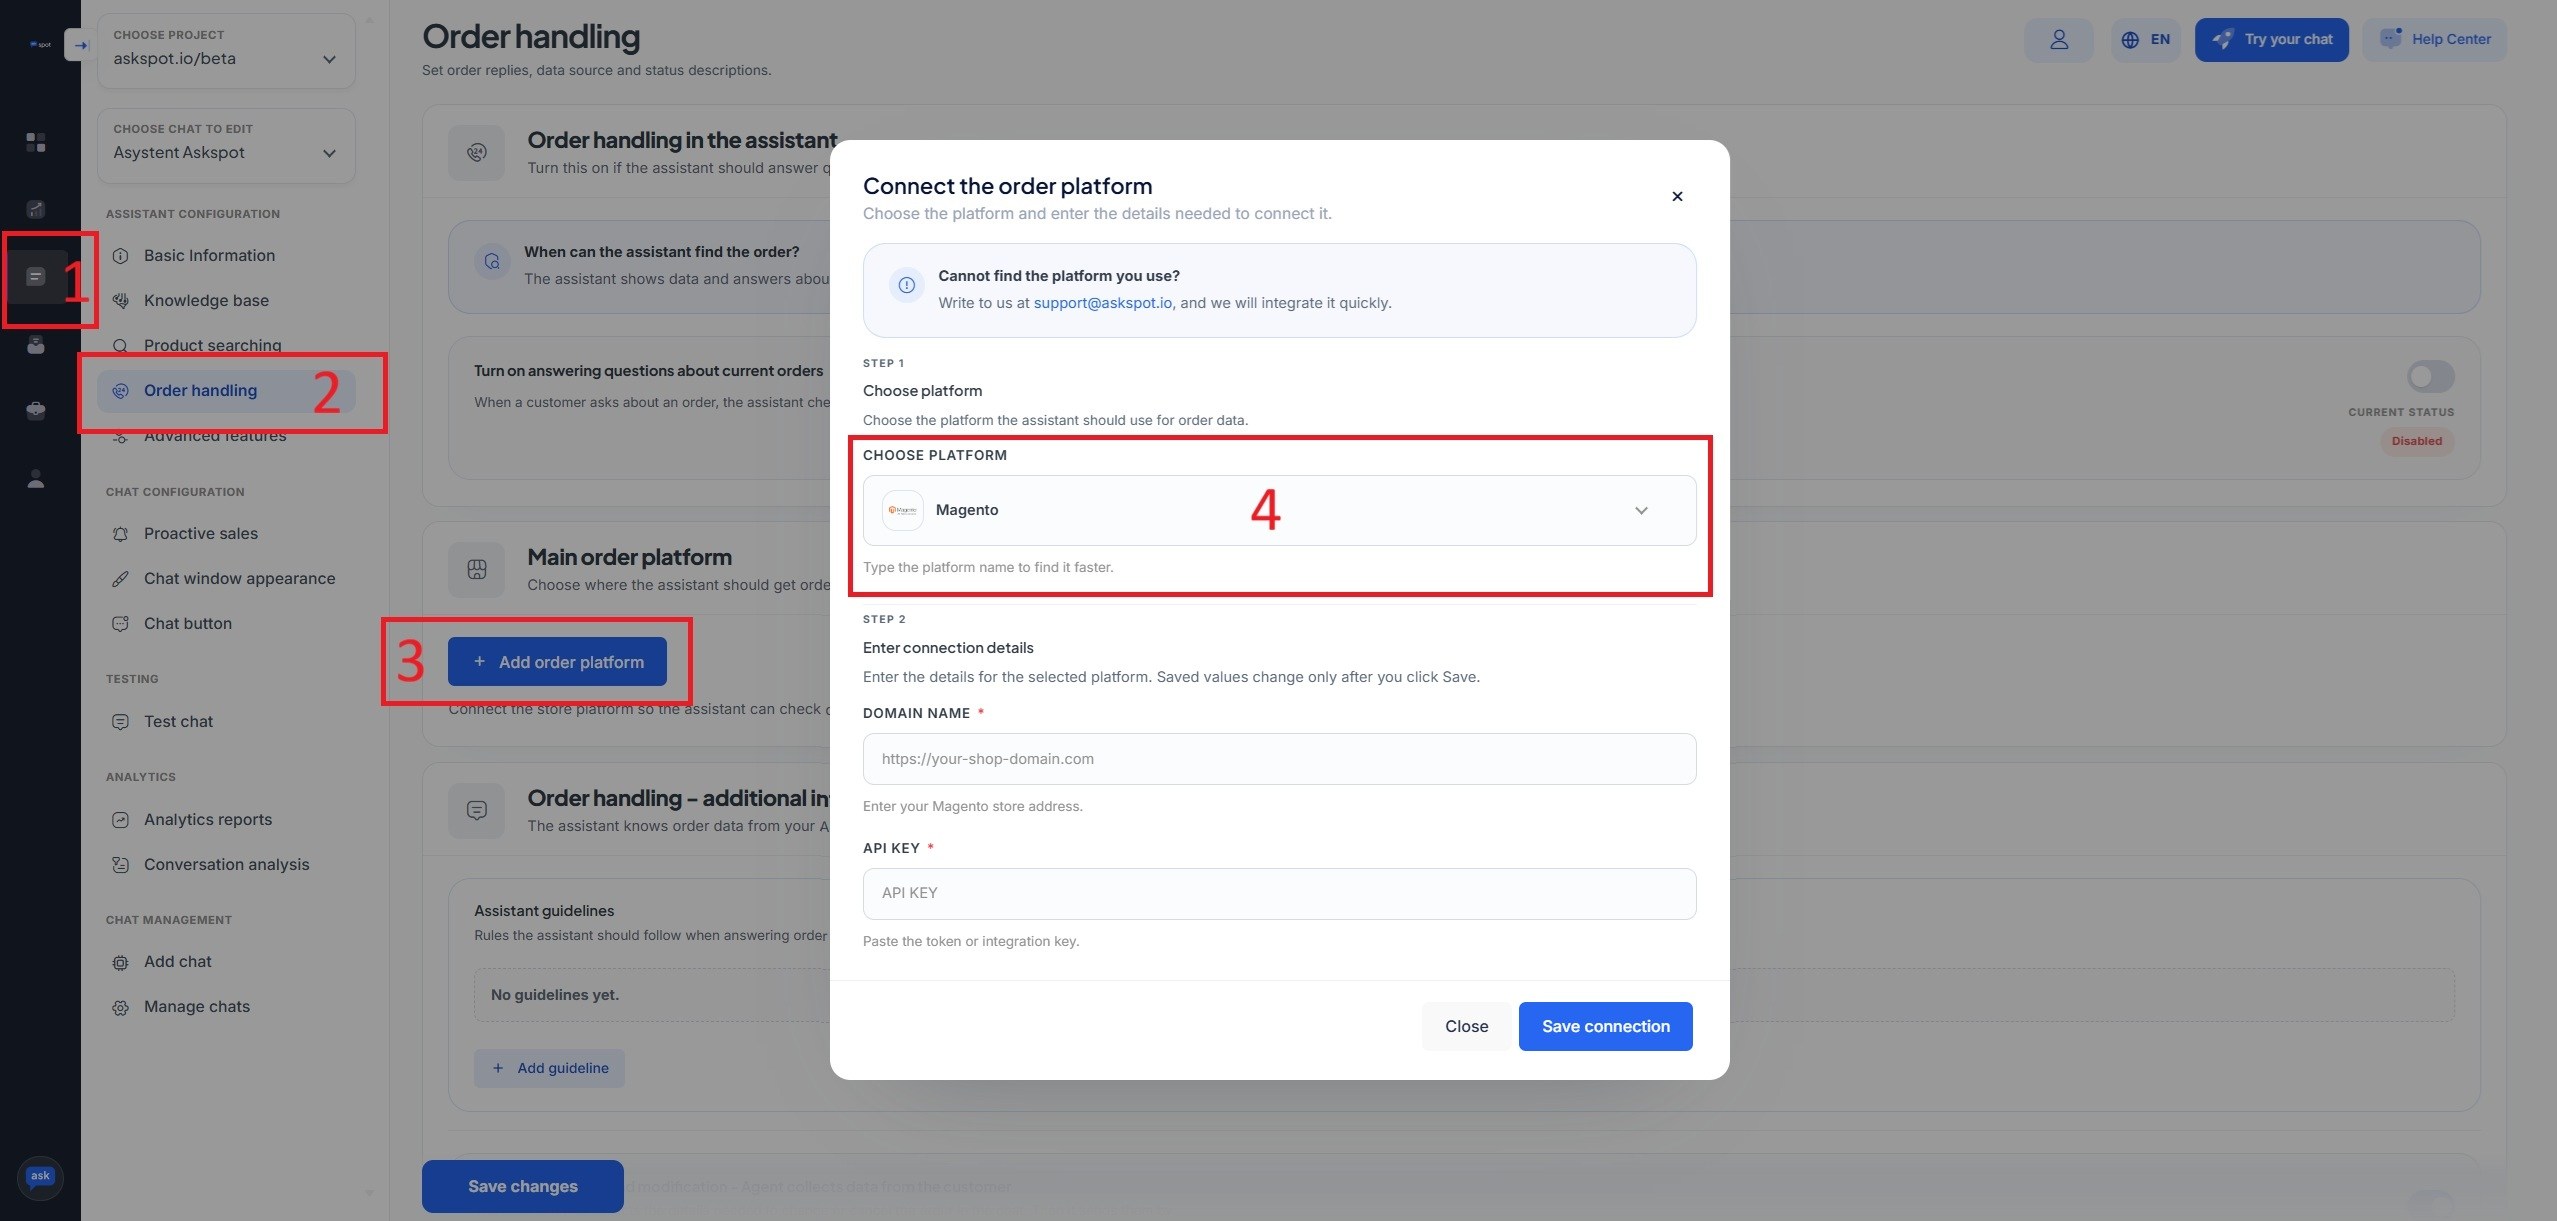
Stuck? Ask the Help center. The AskSpot panel has a Help center in the top-right corner. Tell it what you want to set up and it walks you through connecting and configuring the Agent – you don’t have to do it alone.
From then on the Agent reads orders straight away – the connection behind “where is my order?” answered without a human.
For placement modes, display options and the full picture, see the Magento integration.
Next – measure conversions. Once the chat is live, connect Google Analytics to see which conversations lead to sales. See how to track the AskSpot chat in Google Analytics.
Do I need a plugin to connect Magento to AskSpot?
No. Magento 2 has integrations built in. You create one under System → Integrations, grant read access, and activate it – nothing extra to install.
Which access should the integration have?
Read access to the Sales resource is enough – it covers Orders, Shipments and Invoices. The Agent only performs read (GET) operations, so it cannot change anything in your store.
Which of the four keys do you need?
Only the Access Token. You can ignore the Consumer Key, Consumer Secret and Access Token Secret for this integration.
Official references
For the authoritative, always-current details, see Adobe Commerce / Magento’s own documentation: